THORChain allows users to swap assets across different blockchains directly from one interface. This means you can swap your assets without wrapping them or manually bridging between networks.
This guide will walk you through the full process from choosing your assets to confirming the swap and tracking the transaction.
Step 1. Open the THORChain Swap Interface
Go to swap.thorchain.org.
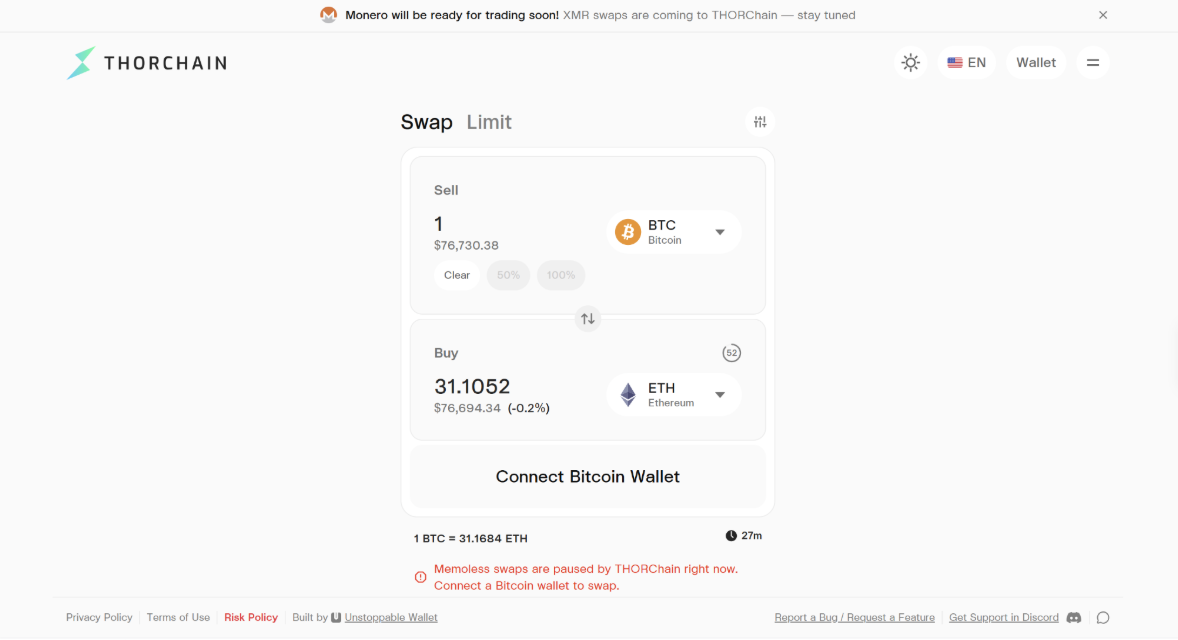
The main swap screen shows two fields. The Sell field is the asset you currently hold, while the Buy field is the asset you want to receive.
You can also switch between a regular Swap and a Limit order from the top of the interface.
Step 2. Connect Your Wallet
Click Wallet in the top-right corner and select Connect Wallet.
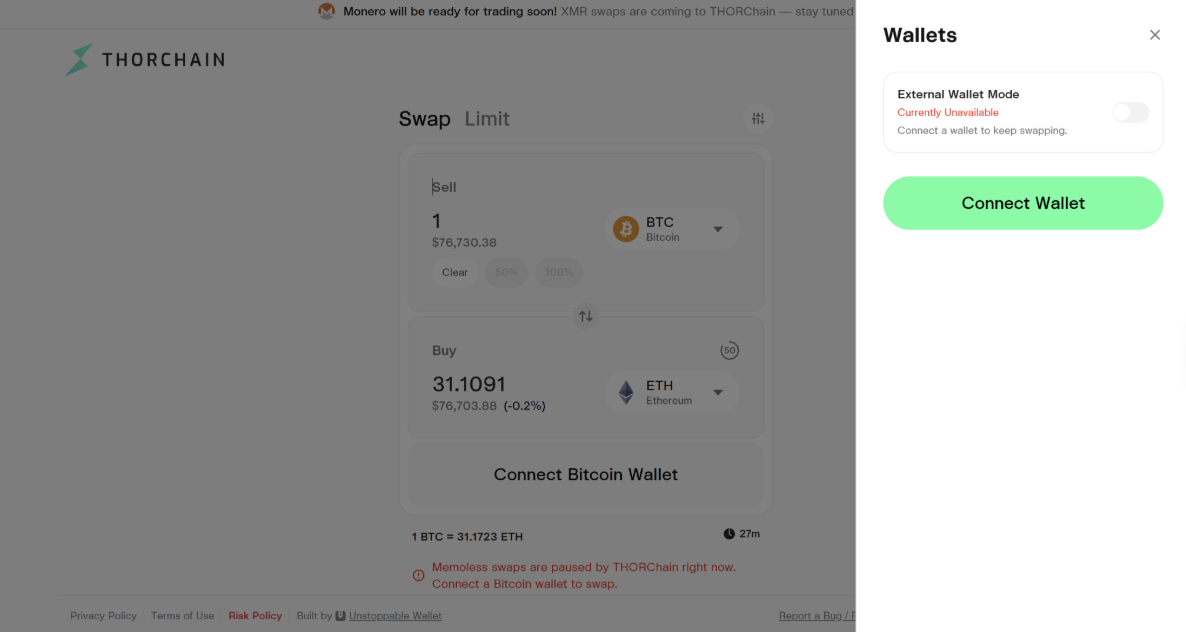
You will see the wallets available for the different supported chains. Depending on the blockchain, these can include MetaMask, Ledger, Trezor, Keystore, and other supported wallets.
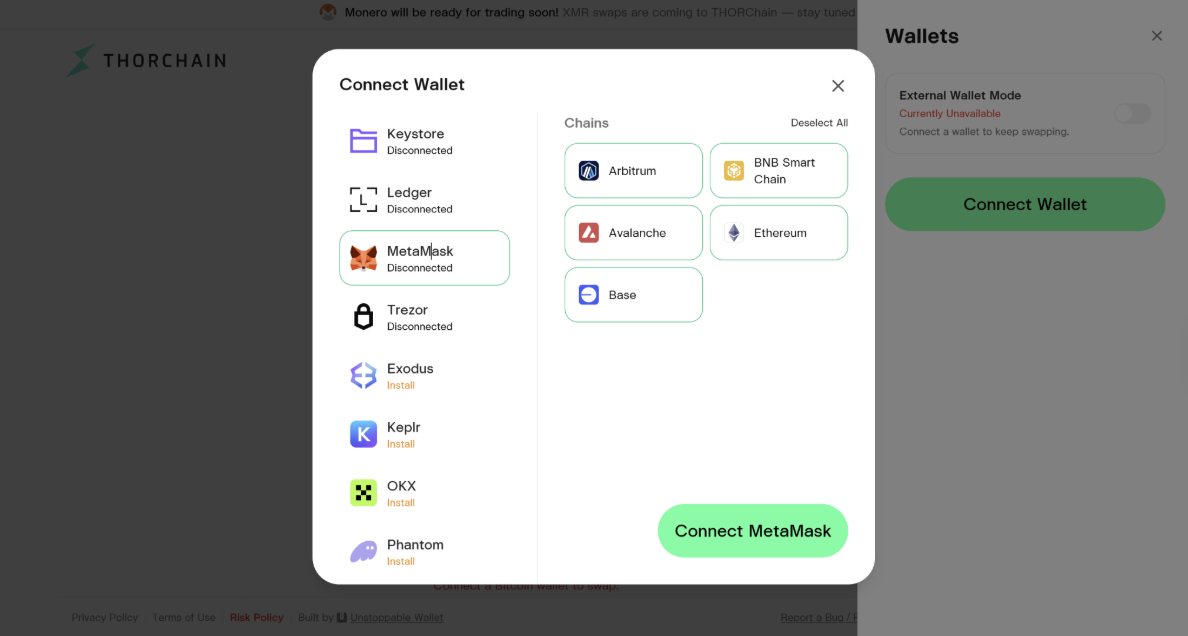
Select the wallet you want to use and choose the chains you want to connect. Once connected, the interface can detect your available assets and balances.
Step 3. Select the Assets You Want to Swap
Now choose the asset you want to sell and the asset you want to receive.
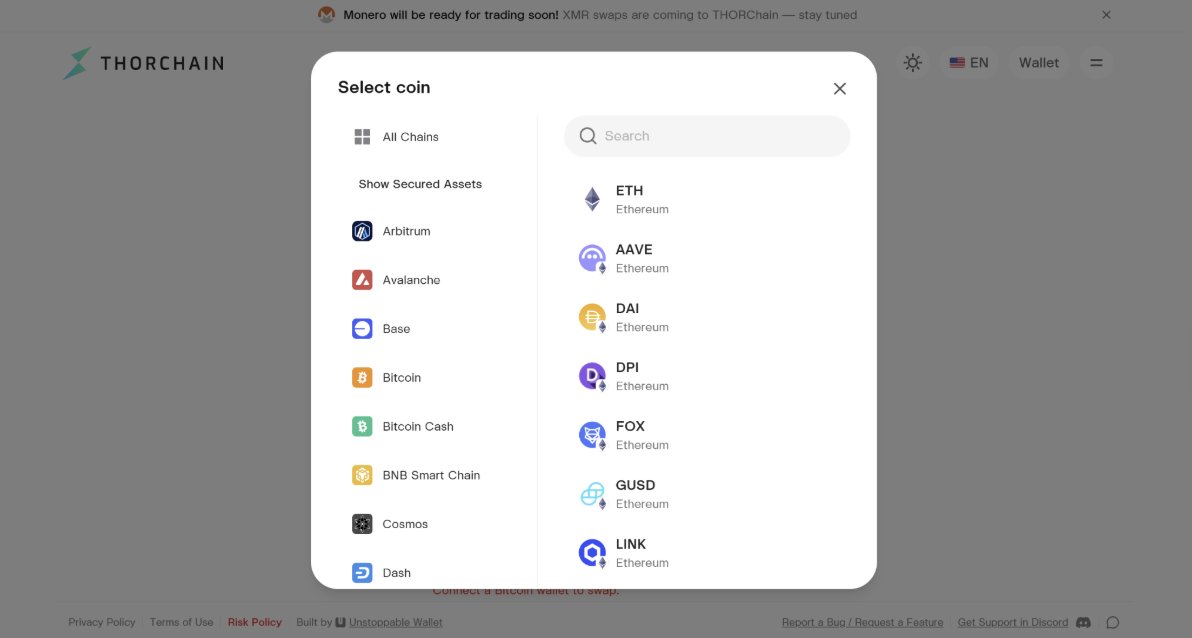
Click the asset selector to browse supported assets by blockchain or search for a specific token.
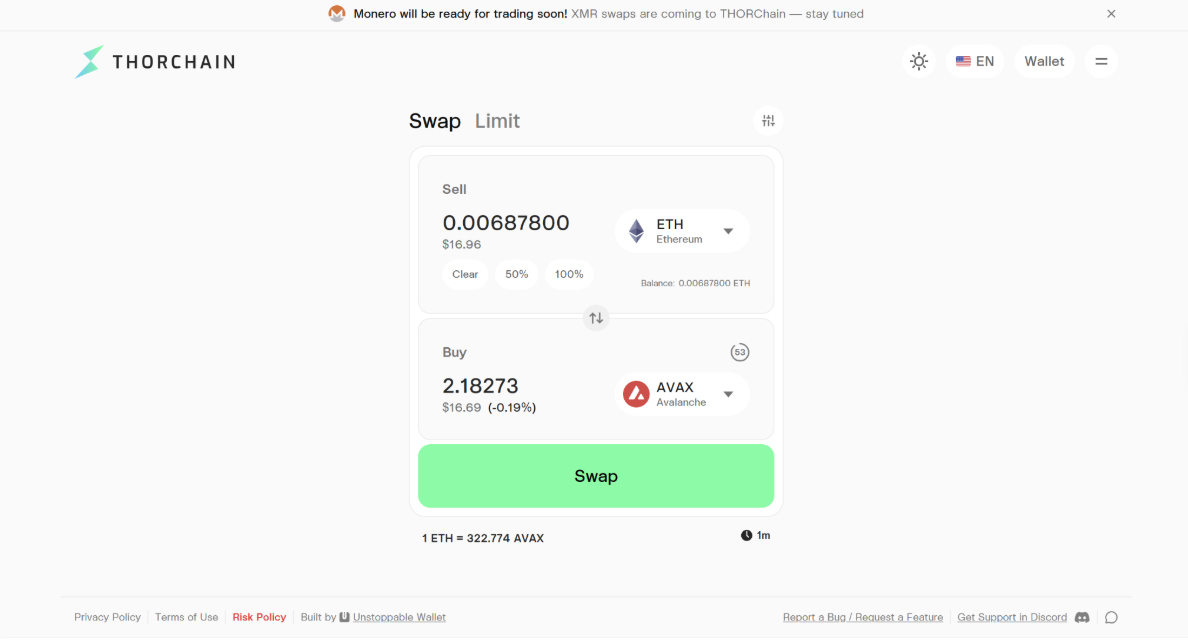
For example, if you want to swap ETH for AVAX, select ETH on Ethereum as the asset you are selling and AVAX on Avalanche as the asset you want to receive.
Step 4. Enter the Amount You Want to Swap
Enter how much of the selected asset you want to sell.
THORChain will automatically calculate the estimated amount of the destination asset you will receive. The interface also shows the approximate dollar value and price impact of the trade.
Step 5. Review Your Swap Settings
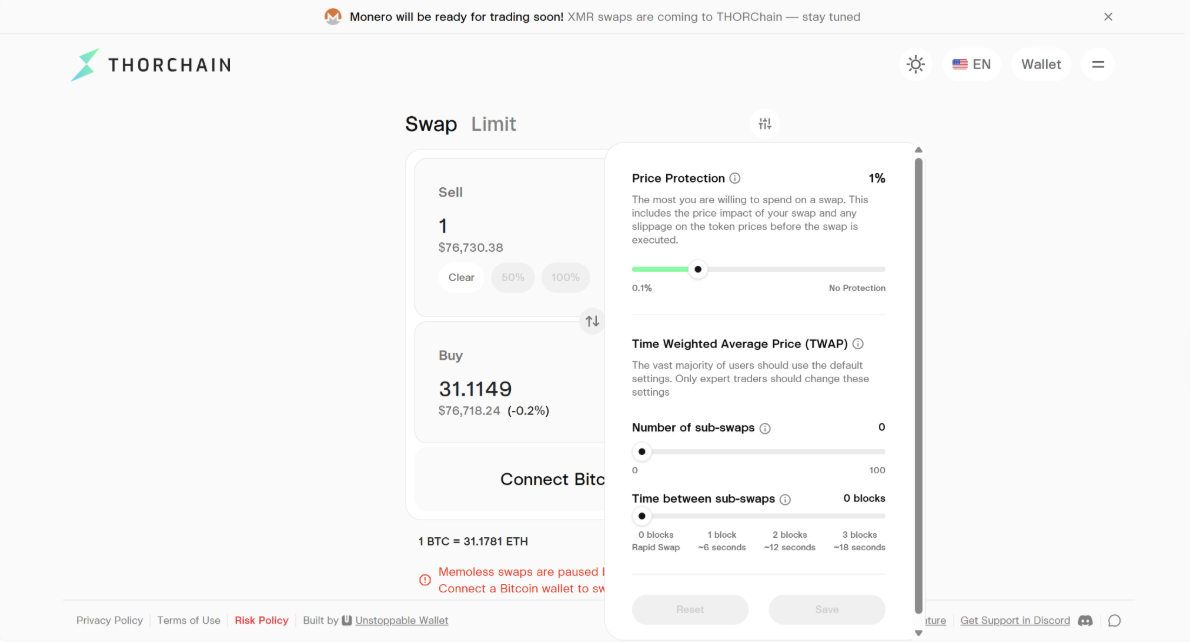
Before making the swap, you can open the settings menu to adjust how the transaction will be executed.
One of the main settings is Price Protection, which determines how much price movement you are willing to accept.
You can also adjust TWAP settings. TWAP splits a larger trade into multiple smaller sub-swaps that are executed over several blocks. You can choose the number of sub-swaps and the time between them.
Step 6. Press Swap and Enter a Receiving Address if Needed
Once everything looks correct, click Swap.
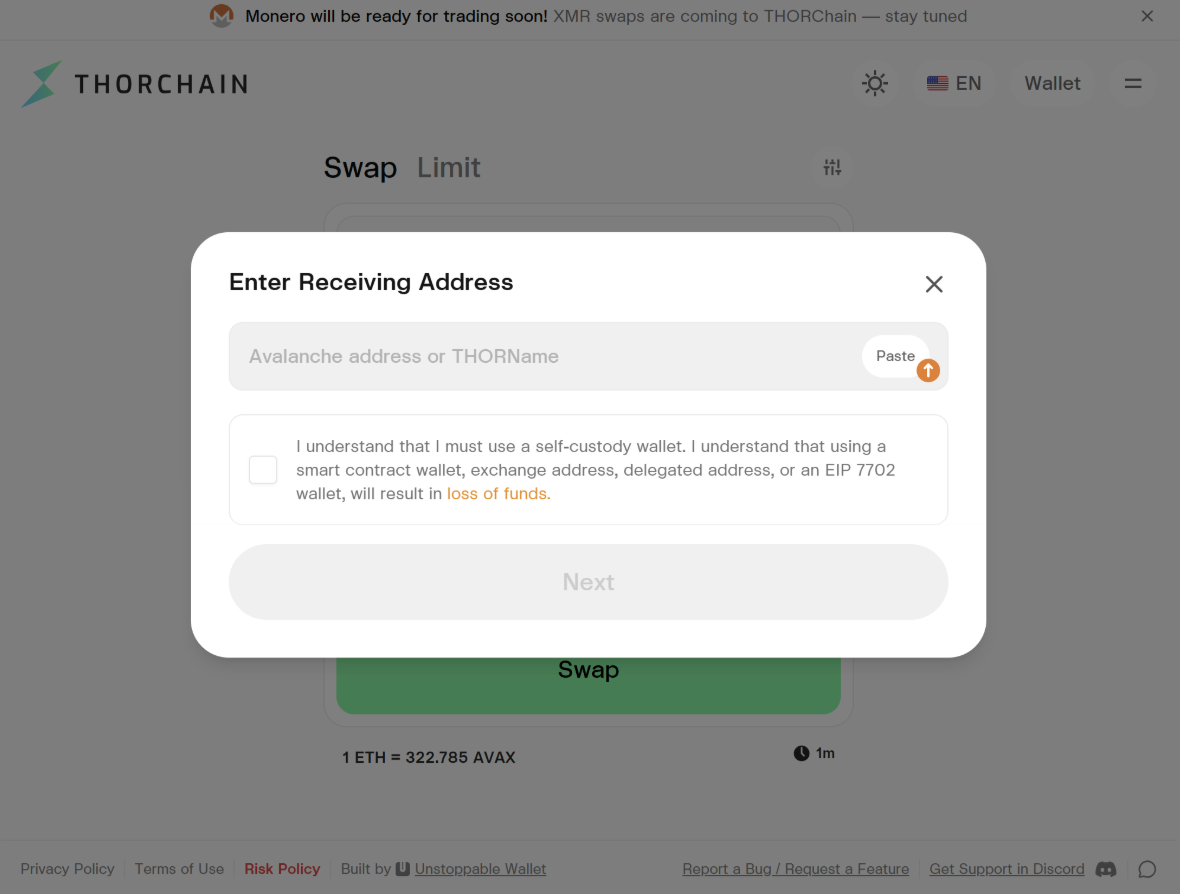
If you do not have a wallet connected for the asset you are receiving, THORChain will now ask you to enter a receiving address.
Paste the address of the self-custody wallet where you want the destination asset to be sent. You can also use a THORName where supported.
The interface will ask you to confirm that you are using a compatible self-custody wallet. Make sure the address is correct before continuing, as sending to an unsupported address can result in loss of funds.
Step 7. Review the Final Swap Details
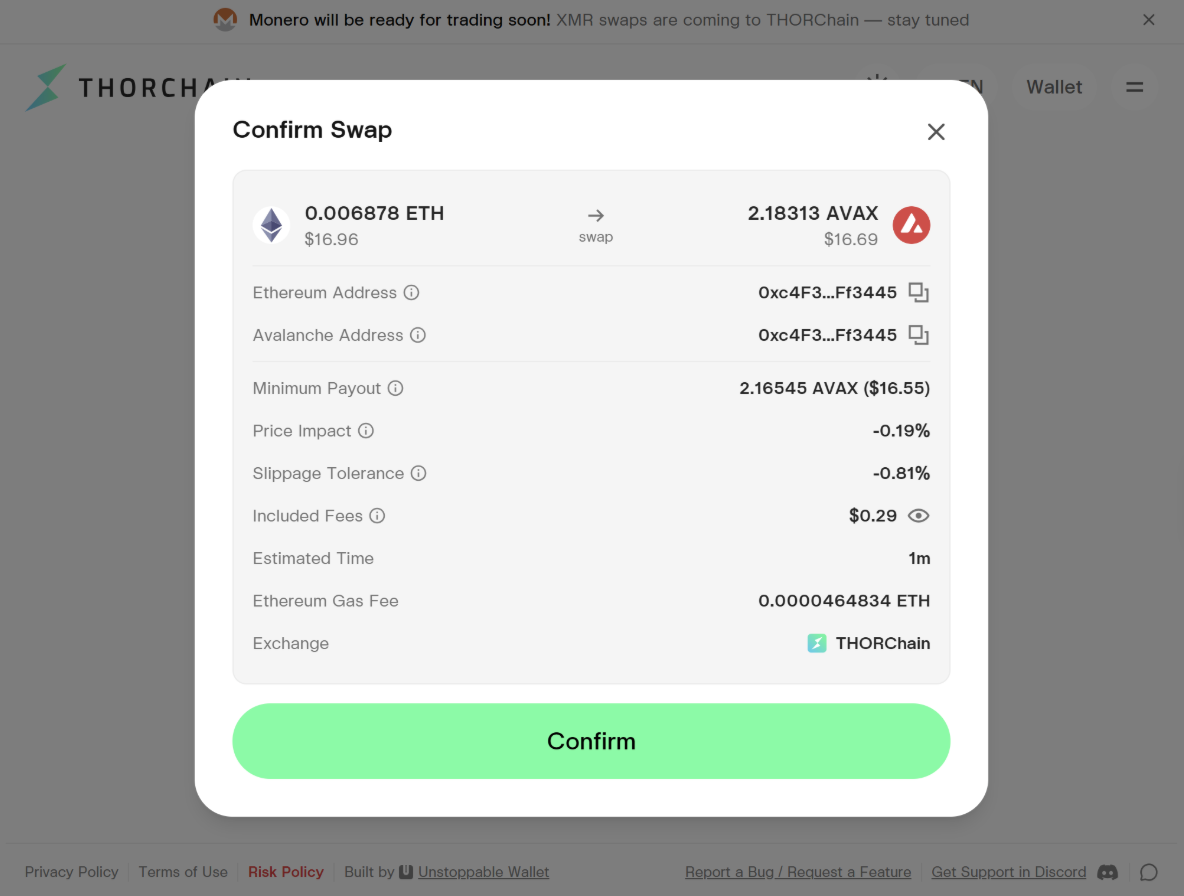
You will then see the Confirm Swap screen.
This shows the important details of the transaction, including the amount you are sending and receiving, the sending and receiving addresses, minimum payout, price impact, slippage tolerance, included fees, estimated time and network gas fee.
Review these details carefully before confirming.
Step 8. Confirm the Transaction in Your Wallet
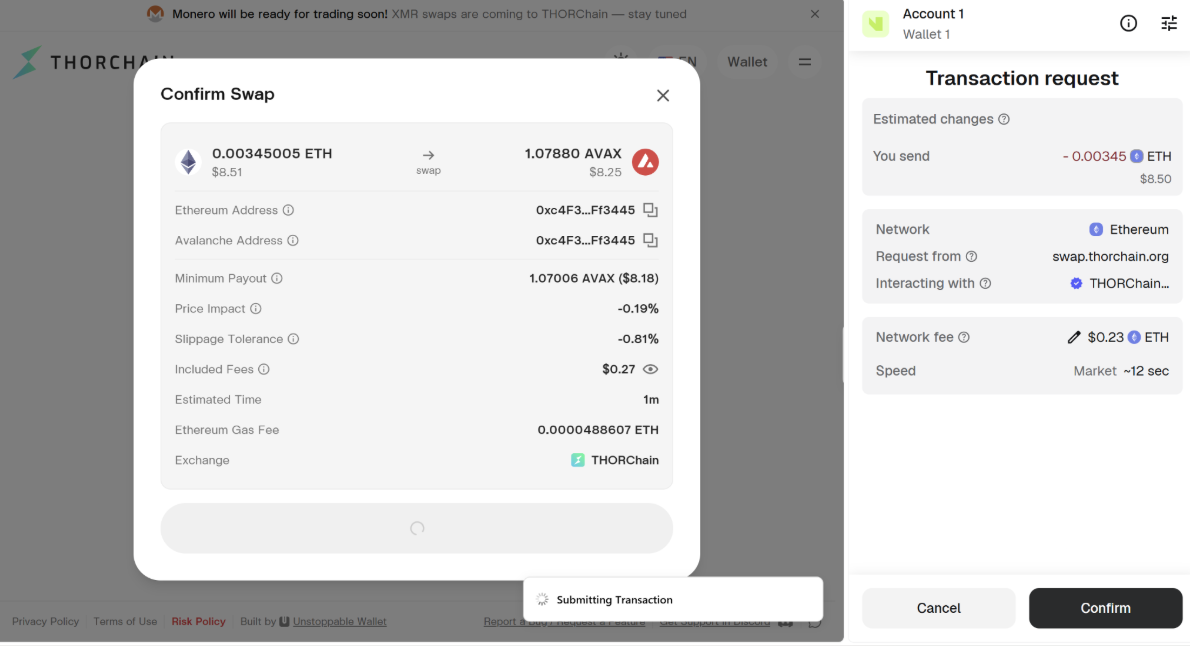
After you have reviewed the transaction, you can click Confirm.
Your connected wallet will open and show the transaction request, including the amount being sent and the network fee.
Approve the transaction in your wallet to submit the swap.
Step 9. Track the Swap
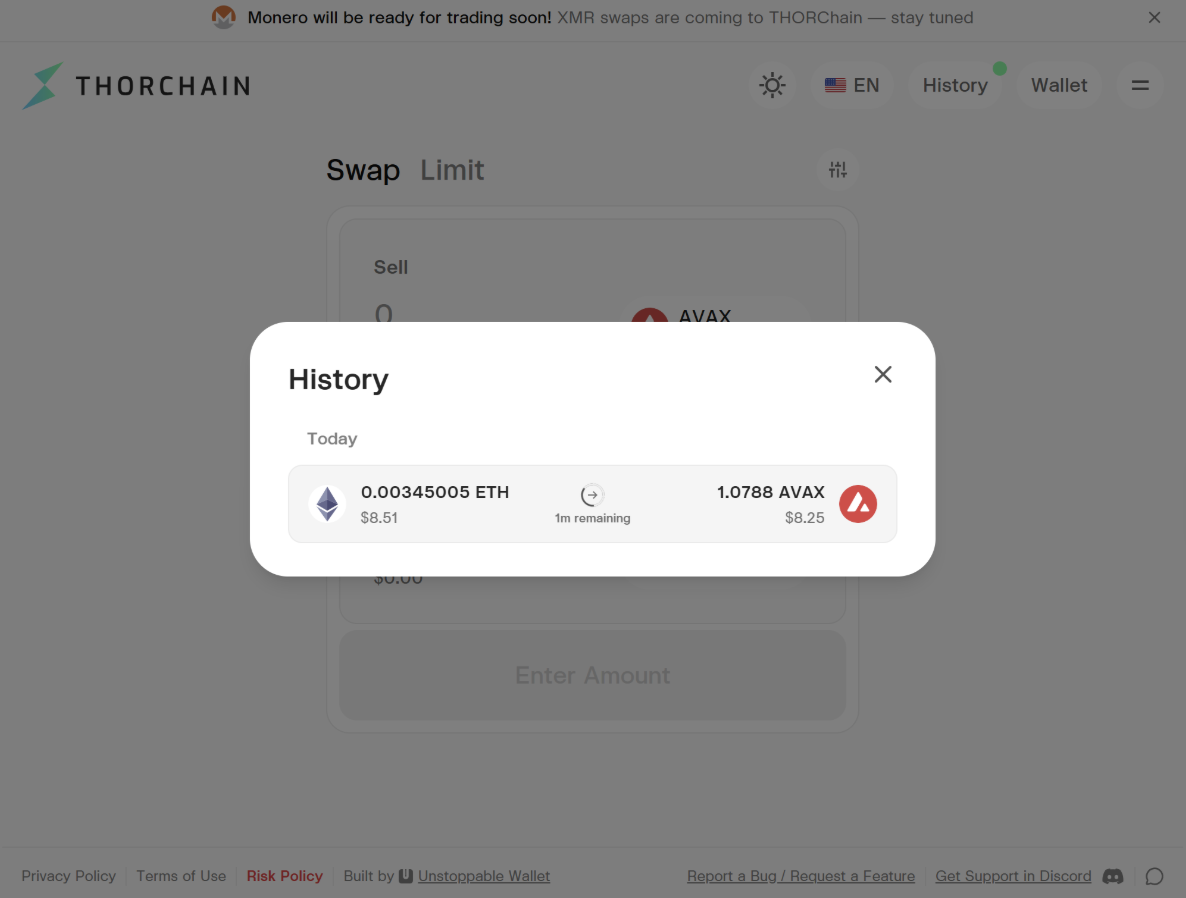
Once the transaction has been submitted, open History at the top of the interface.
Here you can see the asset you sent, the asset you are receiving and the estimated time remaining.
Once the swap has completed, the destination asset will appear in your receiving wallet.
Conclusion
Swapping on THORChain is designed to keep the process simple. Connect your wallet, choose the assets, enter the amount, review your settings, and confirm the transaction. THORChain then handles the cross-chain swap and sends the destination asset to your receiving wallet.
For users who do not want to connect a wallet, THORChain also supports walletless swaps in certain cases. These let you make a swap by sending funds directly from a compatible wallet and specifying where the destination asset should be received.
We have a separate tutorial explaining how walletless swaps work and how to make one safely.

Related articles
![THORChain Thumbnail for the 2026 guide comparing ten decentralized exchanges across cross-chain support, fees and MEV protection.]()
Sep. 10, 2026
The 10 Best Decentralized Exchanges (DEXs) in 2026
- Guide
![Thumbnail for THORChain guide explaining how the Advanced Swap Queue and slip-based fees prevent sandwich attacks on swaps.]()
Sep. 7, 2026
How THORChain’s Swap Queue Prevents Sandwich Attacks
- Guide
![THORChain guide thumbnail explaining how to bond RUNE through direct whitelisting, RUNEBond and bRUNE liquid staking, with yield and risk comparisons for each method.]()
Sep. 2, 2026
How to Bond your Rune: a practical guide
- Guide
![THORChain guide thumbnail showing how to perform a cross-chain swap without connecting a wallet, using the Walletless Swap feature on swap.thorchain.org.]()
Aug. 12, 2026
How To: Walletless Swaps
- Guide
![THORChain is transparent even with privacy coins thumbnail.]()
Jul. 21, 2026
THORChain Is Transparent Even With Privacy Coins
- Guide
![THORChain Community Podcast #198 thumbnail featuring JP and Kenton demonstrating the first live decentralised RUNE to Monero swap on THORChain's chainnet.]()
May. 14, 2026
JP Demos Live Monero on THORChain: 7 Nodes, Real Funds, First Swap Works
- Podcast
- Guide